There are many different methods available when assembling lingerie, from specialised machines for each different stitch, to hand finishing each garment. We wanted to talk you through the ways in which we make our lingerie in our gorgeous studio in Brighton.
What is a lock stitch?
A lock stitch is one of the most basic stitches you can sew and can be found on just about any garment you own. It is a simple straight stitch, which can be used for construction, - for example, creating a seam or for more decorative purposes, such as topstitching.
A lock stitch can also be used to baste pieces of fabric together. In this case, a longer and looser stitch will be used to temporarily hold fabrics together. When the second, stronger stitch is added, the original baste stitch can be removed easily due to its loose nature.
But lock stitches shouldn’t be used on stretch fabrics, as the stitch will break easily under tension.

What is the difference between a one-step zigzag and a three-step zigzag?
Zigzag stitches allow the seams of a garment to stretch without breaking the threads. There are two types of zigzag stitches: a one-step zigzag and a three-step zigzag.
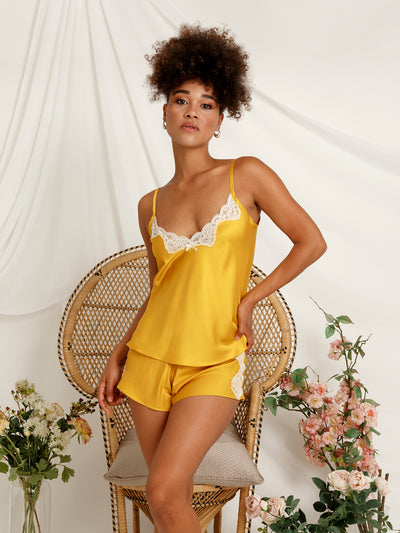
The one-step zigzag stitch can be used around the raw edges of a garment to prevent them from further fraying, without the added bulk of a seam. We use this method when attaching the lace trims to our Bella ranges.
Three-step zigzags consist of three stitches to each arm of the zigzag. This allows for a higher amount of stretch and tension to be placed on the stitch, as the increased number of stitches make it more secure. When attaching the elastic to our garments, we first baste the elastic to the right side of the fabric, then trim the excess seam allowance. Finally, we fold the elastic over to the wrong side of the fabric in order to join the elastic to the garment with a three-step zigzag.

One Step Zig Zag
How are French Seams sewn?
French seams are used to encase the raw edge of the seam allowance between two rows of straight stitches.
First, with the wrong sides of the fabric together, a lock stitch is sewn to join the fabric. Next, the seam allowance is trimmed in half, to ensure that no raw edges can show through the seam. Finally, the garment is turned so that the right sides of the fabric are together, the seam is pressed flat, and another lock stitch secures the fabric.
We use French seams wherever possible, as they are extremely secure whilst still being lightweight. This makes them perfect for using on our delicate fabrics.
What are rolled hems and why do we use them?
A rolled hem consists of two lines of stitching. First, the raw edge of the fabric is folded up onto the wrong side of the garment and sewn in place as close to the fold as possible. Then, the seam allowance is trimmed back, folded up once more and secured with a line of straight stitches. This encloses the raw edge between the two stitch lines.
We use this technique on the hems of our silk slips and camisoles, - and around the legs of some of our French knickers. As rolled hems are more lightweight than other finishes, they are perfect to use on our bias-cut garments, due to the fact they won’t interfere with the drape of the silk.
We also use a variation of this seam when attaching the lace trim to our bed jackets and lavender bags. We first sew the lace to the wrong side of the fabric and trim back the fabric seam allowance. We then turn the lace over to the right side of the fabric in order to sew the second row of stitches along the finished edge of the lace. This secures the raw fabric edge between the two stitches, whilst leaving the decorative edge of the lace to overhang the fabric.

Roll Hems
What is cutting on the bias and what are the benefits?
Cutting fabric on the bias means that the grainline of the pattern piece is at a 45-degree angle to the selvedge, or the edge of the fabric.
We cut garments like our slips, camisoles and teddies on the bias, as this allows the fabric to drape attractively due to the slight stretch offered from the bias grainline. A great deal of care must be taken when cutting and sewing garments on the bias, as pulling the fabric slightly off the true bias can result in an unflattering fit.
We also cut our own bias binding strips, which we use as the straps on our slips and camisoles. This is cut as one long strip of silk on the bias, then pressed with both raw edges folded towards the middle of the wrong side of the fabric. This new strip is then folded in half, with the right side of the fabric facing outwards, and pressed again. We then sew this handmade bias binding from one shoulder strap, around the sides and back of the garment, to the other shoulder strap. Again, this encases the unfinished edges of the garment and gives a clean finish.

We hope you have enjoyed reading about the techniques we use when constructing our lingerie!